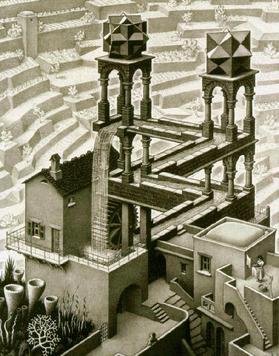
In this blog post, I want to share with you the most complex lamp I have ever made. I was inspired to create this lamp by a sketch by the famous artist MC Escher called "Waterfall," which features a cube shifted 45 degrees about each of the three axes on the top of the left tower.
After going through the assembly process of the previous lamp I made, I knew that this one had to be more assemblable. The previous lamp had screws and fasteners that were difficult to access, which made the assembly process frustrating and time-consuming.
To address this issue, I decided to make the fasteners on this lamp more accessible. Because the faces on this lamp are quite small, I needed to find a way to attach the fasteners without having to put my hand inside the lamp. To do this, I used a different type of hardware that allowed me to attach the joiners together from the outside.
Despite my efforts to make the lamp more assemblable, the assembly process still took significantly longer than I had anticipated. This was partially due to the large number of parts I had to install (a total of 410, compared to 179 on the previous lamp), but mostly due to the hardware I used to attach the joiners together. The 1.4mm Coarse Threaded screws I used were prone to stripping, which made it difficult to extract screws where necessary and forced me to scrap several prints.
Overall, I learned a lot from this project and I'm proud of the final product. Despite the challenges I faced, I think the lamp is a beautiful and intricate piece.
Walk through of the shape.
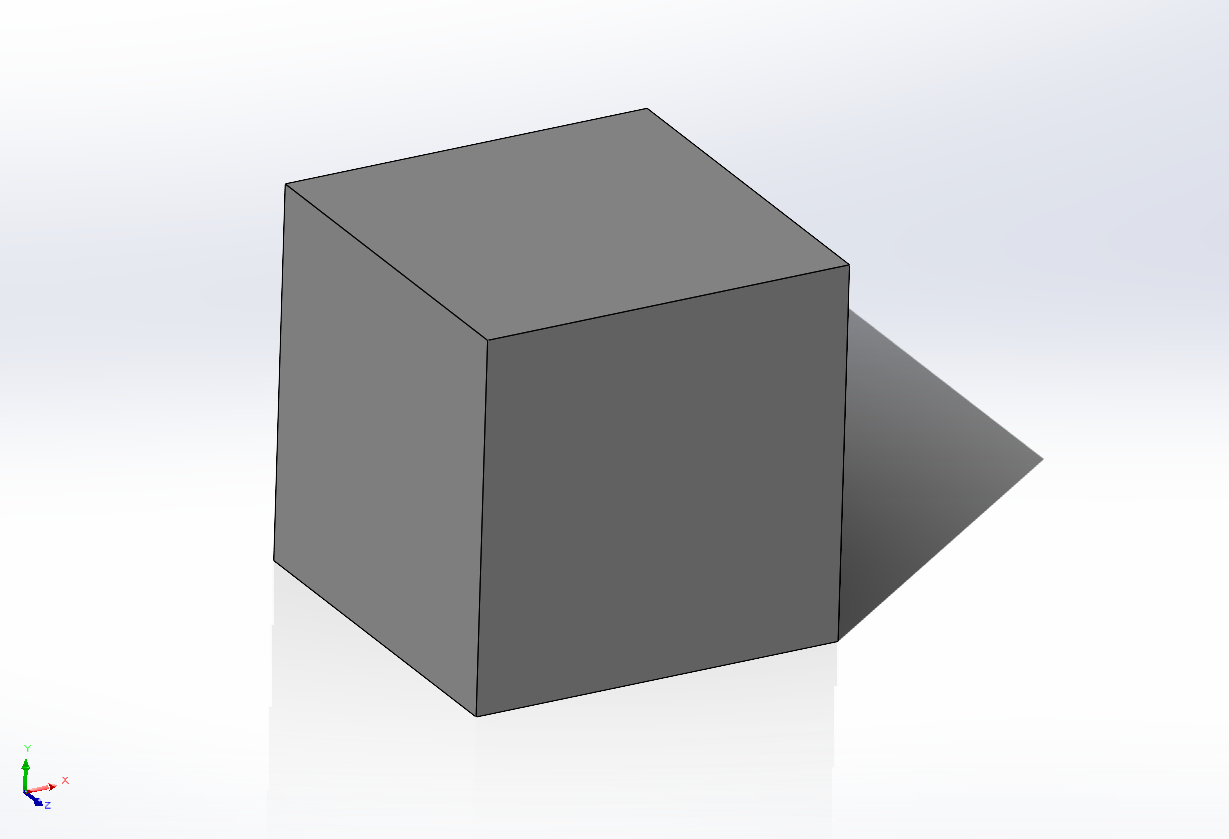
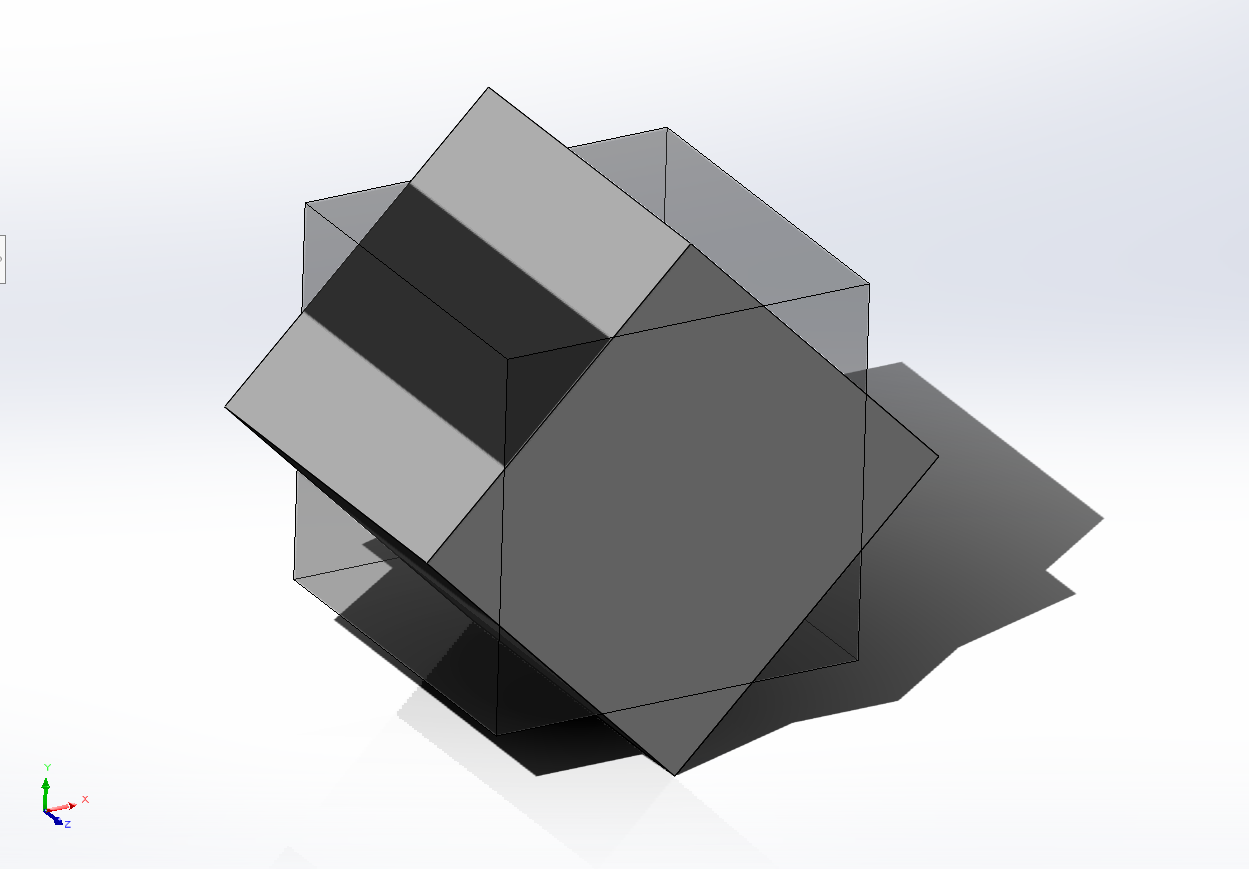
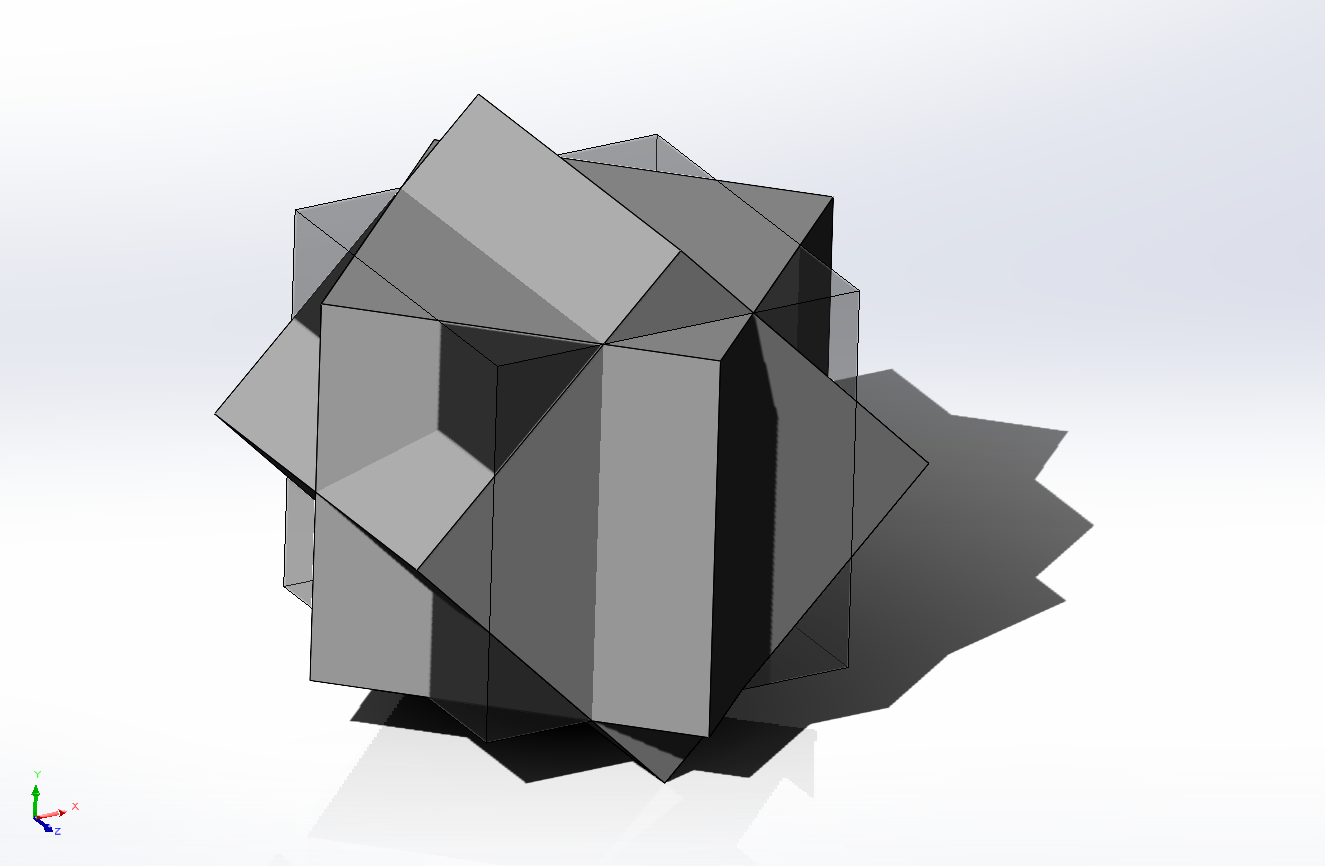


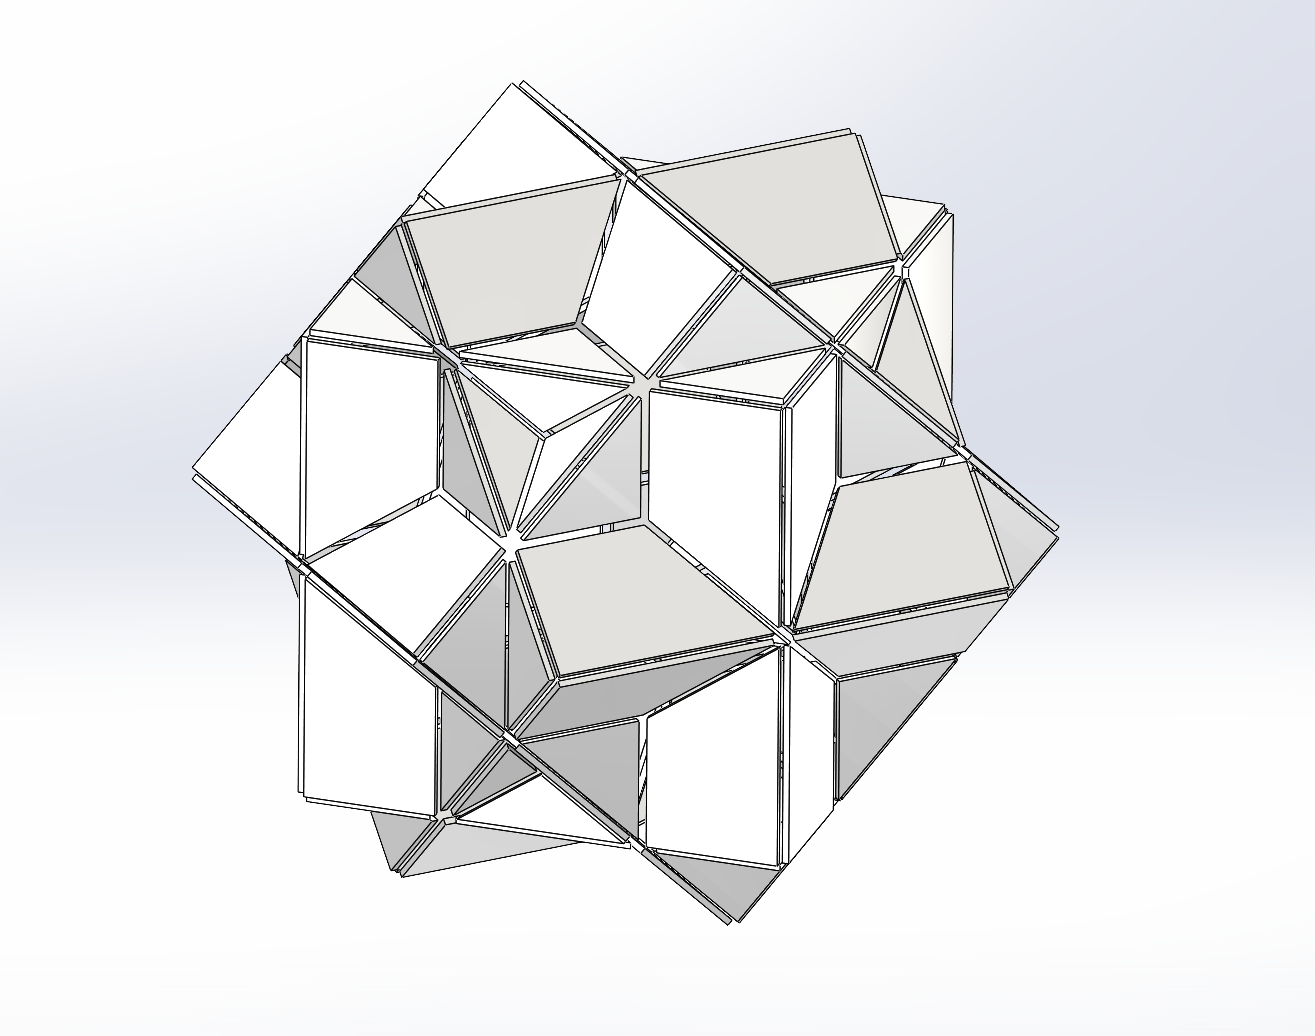

Cool Shape
I discovered this shape via a sketch by MC Escher called Waterfall. It is on the top of the left tower. This shape is a cube shifted 45 degrees about each of the 3 axes. Below is a quick walk-through to better understand the shape.
M.C. Escher’s Waterfall
Different Construction
This lamp is the most complex one I have made. After going through the assembly of the previous lamp I made, I knew that this one had to be able had to be more assemblable. This is especially true because this lamp has 410 custom parts, while the previous one only had 179. Like the previous lamp, the joiner structure can be entirely put together before adding any faces.

Previous Lamp

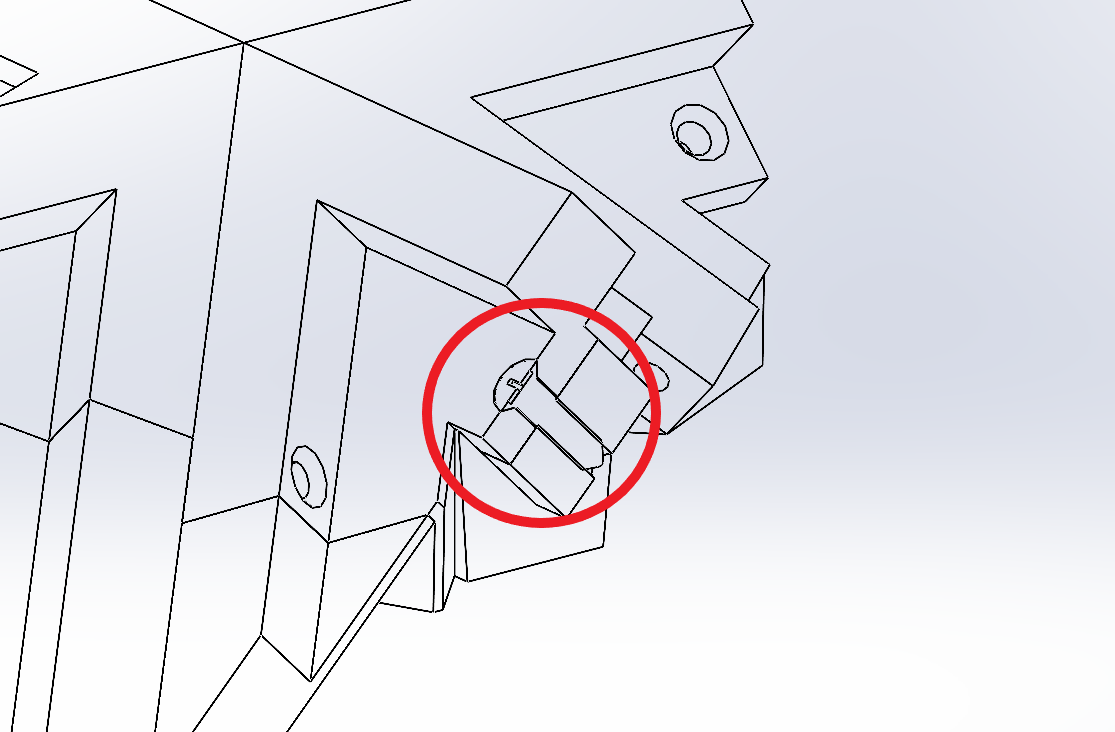
Iteration 1: Recess for Screw Head
Iteration 1: Recess for Screw Head

Iteration 1: The location of the recess for the screw would disrupt the darker region at the border of the joiners.

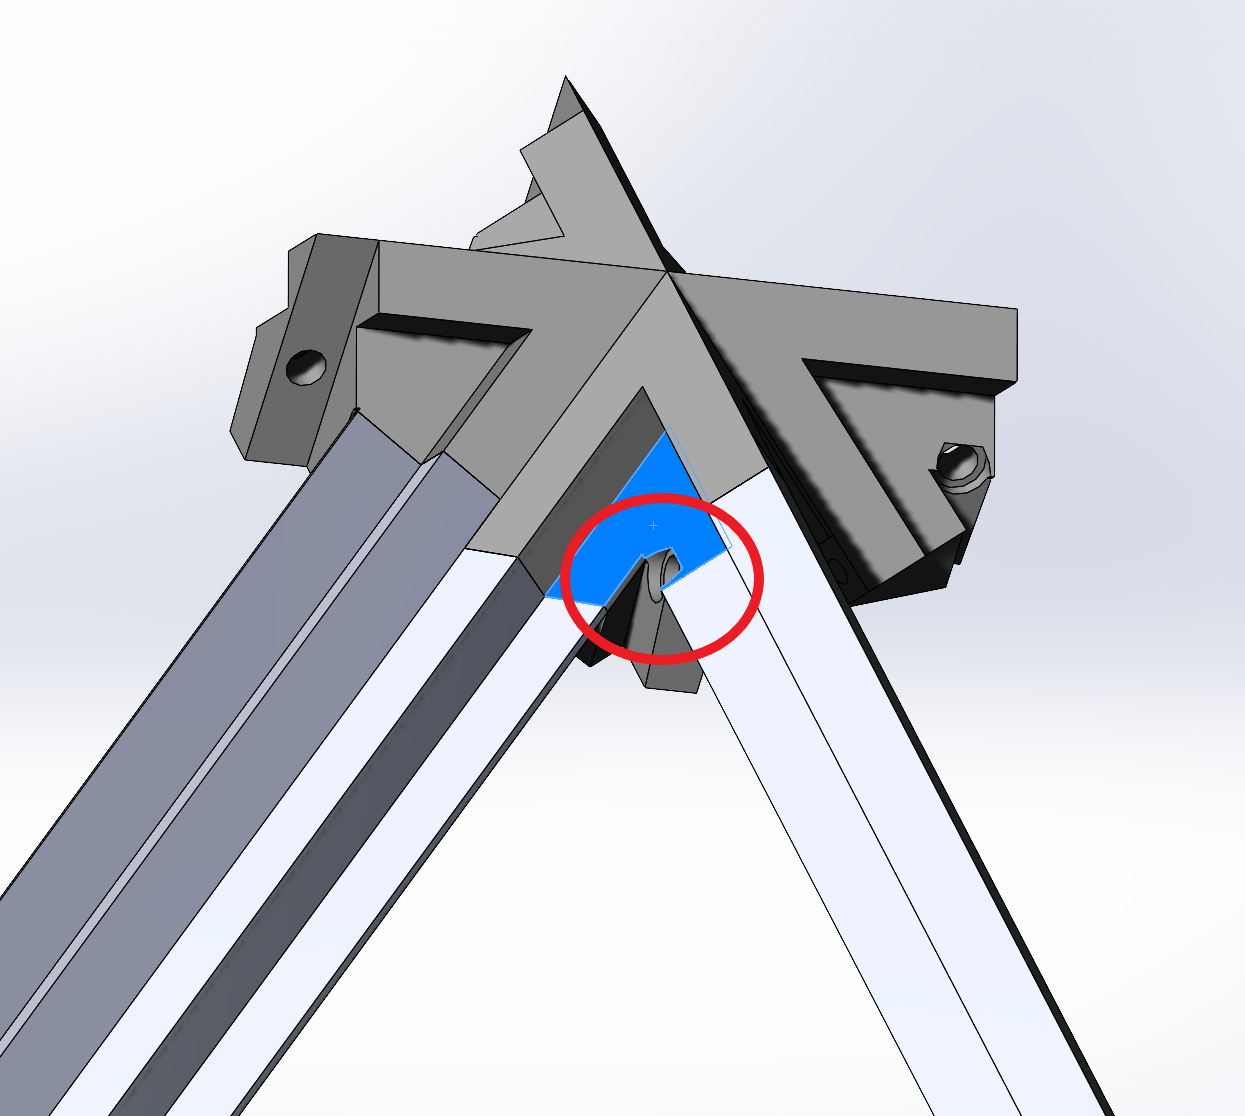
Iteration 2: Fastener Cross Section
Iteration 2: Fastener Cross Section With Screw
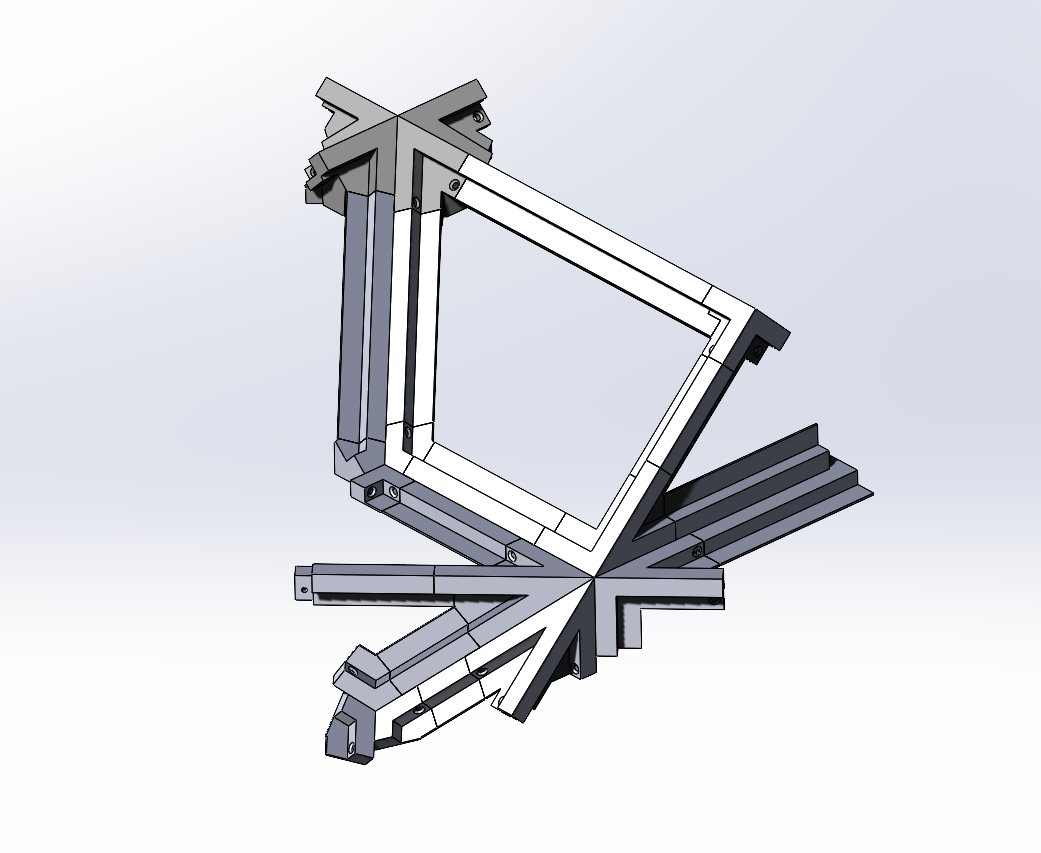
Iteration 2: All Joiners Together
In Progress
I am going slower with this lamp because I am making two. One for me and a kit I am going to send to a friend. When I went to assemble the previous lamp, I kept finding that I was missing parts or some parts had some defects. This time around, I am trying to make this a less painful process for both me and them. So adding part numbers and making some overarching instructions.

Test Fitting Parts


Finished One
I have finished one lamp and am working on assembling a second one for a friend. Unfortunately, assembly took significantly longer than expected. This was partially due to the number of parts I had to install, but mostly due to the hardware used to attach the joiners together. The 1.4 Coarse Threaded screws heads stripped easily. I extracted screws where I could and scrapped several prints.

Test Fitting Parts